VIDEO: What is the FAST MRI DYAMOND study?

Regular Off Off
FAST MRI DYAMOND


Video Transcript

Have you recently received a letter from the NHS breast screening programme inviting you to come for your first screening mammogram?

The NHS provides a breast screening service because early detection of breast cancer saves lives.

The NHS screening programme has been using mammograms to detect cancer since 1988… But still, 30 women die of breast cancer every day in the UK.

The FAST MRI DYAMOND study is looking to see if a new form of MRI scan, called FAST MRI, can pick up aggressive cancers even earlier than mammograms can. 

The NHS already uses breast MRI to detect cancers, but only for women who have a very high likelihood of having breast cancer. For these women, MRI detects breast cancers earlier than mammograms and saves more lives.

The FAST MRI DYAMOND study will be the first UK study to offer a FAST MRI scan to women at normal or average risk, aged 50-52. People invited for their first screening mammogram can take part at 4 NHS breast screening services in England. (BristolCheltenhamSwindonTruroLondon (St George’s & King’s College).

Everyone’s breasts are different, and in addition to how breasts look and feel in real life, they also look different on mammograms.

At age 50-52, breasts can look completely white on mammograms. They can also look completely dark. Both appearances are normal, as are all the different combinations of white and dark in between. These differences are called mammographic density or breast density.

The problem is that breast density can make a small cancer difficult to spot on a mammogram. Breast cancers tend to show as white on mammograms, so you can see how much easier a cancer would be to spot on the dark mammogram on the left than on the white mammogram on the right.

Fortunately, however, FAST MRI works well at detecting small cancers for women of all breast densities. The pink arrow highlights what a cancer, that was completely invisible on the mammogram, looks like on FAST MRI.

Breast screening with mammograms already saves around 1,300 lives each year in the UK by finding cancers that are too small to feel or see. 

FAST MRI could find cancers even earlier for women and our research is designed to find out which women would benefit from breast screening with FAST MRI through finding breast cancer even earlier than mammograms.

We want to find breast cancers earlier because:

  • finding cancer early makes it more likely that treatment will be successful
  • finding cancer early makes it less likely that a mastectomy will be needed
  • finding cancer early makes it more likely that the cancer will be cured.

The only way to discover your breast density is to have a mammogram.

The FAST MRI DYAMOND study wishes to offer a FAST MRI scan to 1000 people who all have average breast density. At age 50-52, four out of every 10 women will have average breast density and could join the FAST MRI DYAMOND Study to have a FAST MRI scan. 

We can only find out whether you can join the study if you give us your contact details and let us know you are happy for us to use your mammogram to measure your breast density.

Research is fundamental to improving treatment and care for patients and the public but it is your choice whether you join the study or not.

If you are having your first screening mammogram and would like to learn more about the FAST MRI DYAMOND study, please fill in a FAST MRI DYAMOND consent to be contacted form, either online or at your mammogram appointment. 

This is the web address of the online form. 

If you would like to ask any questions at all, you will find the telephone number for the nurse from your local research team below this video along with the link to the online form.

Thank you for taking the time to watch this film. Thank you for helping us with this research.

Interested in taking part?

To view the Patient Information leaflet and Consent form, please visit the study website.

DYAMOND web banner (1).png

Support for External Funding Applications

Regular Off Off

The Research Development & Grants Team can provide you with a range of support at every stage of your grant application/project development.

Please contact ResearchGrants@nbt.nhs.uk at the earliest opportunity. 

Grant development support includes:

  • Advising on the most appropriate funder/funding stream
  • Deciding which institution will Host and Sponsor your grant
  • Advising on and facilitating Public and Patient Involvement & Engagement
  • Signposting to wider support services
  • Supporting collaborations
  • Liaising with external organisations/companies and obtaining external costs
  • Providing a full grant costing for non-commercial and investigator-led projects. This includes NHS site costs (and supporting your SoECAT submission, where applicable). 
  • Critical, pre-submission reviews
  • Feasibility sense checks
  • Support statements
  • Intellectual Property advice
  • Proof reading
  • Online application form entry

It takes time to fully develop a research project and to cost a grant accurately. All requests to NBT to cost a research grant application must be made well in advance of the funder’s submission deadline. The time required to achieve a high-quality submission can depend greatly on the type of funder and project.

We recommend that you contact the Research Development & Grants Team at ResearchGrants@nbt.nhs.uk, at the earliest opportunity – as soon as you begin to develop a research project – so that we can provide you with the most comprehensive support. 

Once your project is funded, our team can support you with grant set-up and management. This includes: contracting, financial management, protecting Intellectual Property, reports and external communications.

View Our Research

Doctor conducting research at NBT

Explore the ground-breaking research currently taking place at North Bristol NHS Trust.

About Research & Development

NBT Researcher

Find out more about our research and how we're working to improve patient care.

Contact Research

Research & Development
North Bristol NHS Trust
Level 3, Learning & Research building
Southmead Hospital
Westbury-on-Trym
Bristol, BS10 5NB

Telephone: 0117 4149330
Email: research@nbt.nhs.uk

Internal Funding Opportunities

Regular Off Off

The Research & Development Office administer a number of internal funding opportunities. 

These are available to all NBT staff with a research idea that they want to develop into a project. 

We frequently make awards for small research projects, as well as personal awards for those wanting to pursue a career including research. Below are some of the funding options currently available. 

To apply, or for more information, contact: ResearchGrants@nbt.nhs.uk.

Research Capability Funding (RCF)

Funding to back-fill your time to develop research ideas into funded grants

Research Capability Funding (RCF) is a research funding stream made available by the National Institute of Health Research (NIHR) to help research-active NHS organisations attract, develop and retain high-quality research, clinical and support staff. North Bristol NHS Trust (NBT) has two rolling calls for applications, as well as an annual Research Infrastructure call: 

Early Career/Early-Stage Research Funding – Open for Applications

Applications are welcomed from NBT staff members wishing to fund their time to develop a research idea of relevance to the NHS and of benefit to patients. This rolling funding call is specifically aimed at staff substantively employed by NBT from non-medic staffing groups such as nurses, midwives, Allied Health Professionals and scientific and technical services who do not currently have protected time for research activity within their job plan. 

No prior experience of research is necessary as R&D will provide you with mentorship and support to scope out your research idea and explore the potential for developing this into a funded research project.

Standard Call

Applications are welcomed from NBT staff members who are actively working towards an NIHR grant(s) for submission within the next 12 months. This is a rolling call, and applications are welcomed at any time during the year. 

Applicants are strongly encouraged to contact R&D and the Research Support Service (RSS) to gain guidance on the various NIHR funding streams before applying for this call. NIHR applications, developed with support from RCF, will be led and hosted by NBT, supporting NBT’s excellent reputation in research and positively impacting NBT’s research portfolio.

Funding for delivering small research projects

NBT R&D Strategy recognises the importance of building research capacity. Therefore, funds from centralised charitable donations continue to support the Southmead Hospital Charity Springboard Research Fund.

Southmead Hospital Charity Springboard Research Fund

This fund supports NBT staff to undertake research projects (max. £25k per project) which could be directly implemented in the NHS, or feed into larger funding bids with the potential for future impact on the NHS. Applications are invited from NBT staff, including clinicians, nurses, midwives, and allied health professionals (AHPs) from any clinical area. 

Springboard supports staff with a range of experience, from staff with no prior research experience applying for their first research grant, through to an experienced researcher looking to undertake pilot, feasibility, or proof of concept work. 

R&D understand that applying for research funding can be daunting, but there is plenty of support available to help develop an application. Please contact researchgrants@nbt.nhs.uk as soon as possible to benefit from support

View Our Research

Doctor conducting research at NBT

Explore the ground-breaking research currently taking place at North Bristol NHS Trust.

About Research & Development

NBT Researcher

Find out more about our research and how we're working to improve patient care.

Contact Research

Research & Development
North Bristol NHS Trust
Level 3, Learning & Research building
Southmead Hospital
Westbury-on-Trym
Bristol, BS10 5NB

Telephone: 0117 4149330
Email: research@nbt.nhs.uk

Non-nutritive sucking in preterm babies

Regular Off Off

This page aims to give you information about why we offer babies soothers for non-nutritive sucking while they are on the Neonatal Unit. This is to help you decide whether you are happy to give your baby a soother while they are on the NICU.

One of the earliest reflexes a baby has is their sucking reflex. In your womb your baby will have had practice sucking their hands and swallowing amniotic fluid. Ultrasound pictures have shown this happening from 11 weeks gestation. Babies of all ages find sucking soothing and comforting. This is how babies learn to coordinate sucking, swallowing, and breathing which is needed for successful feeding.

What is non-nutritive sucking?

Non-nutritive sucking is when a baby sucks without receiving any nutrition, for example on a finger, dummy, or an empty breast.

Babies can do this to comfort themselves, but also for practicing feeding. Babies in the womb will practice their sucking, swallowing, and breathing coordination using the amniotic fluid in preparation for being born.

If a baby is born prematurely, they will get nutrition through a drip/IV lines and will miss out on this practice. We can offer them a soother if they are wanting to suck, such as at feed times

As your baby establishes feeding, the need for non-nutritive sucking will reduce, however the soother can still be used for pain relief if you are not present to provide comfort.

What are the benefits of non-nutritive sucking?

  • Helps tube fed babies associate sucking and having a full stomach, reinforcing association between positive sensations in the mouth and hunger satisfaction.
  • Aids with the transfer to nutritive sucking on breast or bottle.
  • Improves oral muscle tone and coordination.
  • Helps to calm term babies who are nil by mouth.
  • Calming the baby reduces energy use which will help improve growth and weight gain.
  • Helps with digestion as it stimulates the stomach.
  • Along with mothers breast milk (MBM) or sucrose solution, non-nutritive sucking has been shown to provide pain relief to babies during painful procedures.

This page has provided you with information on non-nutritive sucking while your baby is in the NICU learning to feed and for use during painful procedures. Speak to your health visitor for further guidance on the use of soothers as your baby develops at home. 

If you would like further information about non-nutritive sucking please speak to a member of staff.

© North Bristol NHS Trust. This edition published October 2024. Review due October 2027. NBT003240

Taking part in the FAST MRI DYAMOND study

Regular Off Off

Finding breast cancers early saves lives. 

We know that the earlier a breast cancer is diagnosed the better the outcomes for that patient. Mammograms (a type of breast x-ray) have been used for many years to check for breast cancers but may not always find cancers early enough to be helpful.  We would like to try out a new method of MRI, called “FAST MRI”. 

It is like the MRI scans you may have heard of or experienced, but takes much less time, about 3-5 minutes, which would make it suitable to offer to many more people.

What is the FAST MRI DYAMOND study? 

DYAMOND will test if a FAST MRI scan can detect cancers not seen on mammogram, in women with average density breasts. 

1000 women will be invited for a FAST MRI if:

  • they are aged around 50-52,
  • their mammogram is clear
  • their breast density is “average” (a computer measures this from mammogram images) 

What sites are running this study?

  • North Bristol NHS Trust

    Opening late Spring 2025:

  • Great Western Hospital (Swindon)
  • Royal Cornwall Hospital
  • St George's University Hospitals (London)
  • Gloucestershire Hospitals Trust 

What are the stages of the study?

Stage 1

This first stage includes looking at Mammogram images from your routine Breast Screening appointment. We check to see if you're able to have a FAST MRI scan by measuring your mammogram breast density and checking your screening records. Women with “average” breast density and a clear mammogram may be able to continue on to Stage 2 to have a FAST MRI scan. 

Please note, agreeing to take part in Stage 1 does not mean you will automatically have a FAST MRI scan. If the Stage 1 density grading shows you are eligible to take part in Stage 2, you will be invited and can then decide whether to take part or not. 

Stage 2

The second stage of the FAST MRI DYAMOND study involves having the FAST MRI scan. A member of the research team will contact you to give you the information about Stage 2.  They will discuss the study with you. If you can have the scan and would like to, they will book you a scan appointment. The scan itself takes just 3-5 minutes, but the whole appointment would last up to 45 minutes. 

Stage 1 - Patient Information

Who can take part?

Women with “average” breast density and a clear mammogram may be able to have a FAST MRI. To find this out, we are first inviting women to Stage 1 of the DYAMOND study. 

If you agree to take part in Stage 1, we will send your mammogram to the DYAMOND team at the Royal Surrey NHS Foundation Trust so that they can measure your breast density. We won’t send your mammogram to be measured for 10 working days after we receive your consent. This is in case you change your mind about participating. If you do, please let us know. 

The results will then be sent to Warwick Clinical Trials Unit, to be stored. 

If your mammogram is measured as anything other than average breast density, you will be looked after by the screening service, and you won’t be able to take part in this study. This is because we are only inviting people with “average” breast density to have a FAST MRI.

If your mammogram measurement is in the “average” breast density group, we will look at your mammogram screening results to check if the screening service says you need any further investigations. This is because in this study, we are only inviting people with clear mammograms to have a FAST MRI.

If you do need some further investigations, the screening service will contact you directly. You won’t be able to have the FAST MRI scan as part of this study. Instead, with your consent, we would like to access your screening and medical records to discover the outcome of your investigations. We will do this for up to 3 years after your first mammogram.

If the screening service says your mammogram needs no further investigations and you are in the average breast density group, we will send you information and an invitation to take part in Stage 2 of the study.

Agreeing to take part in Stage 1 does not mean you will automatically have a FAST MRI scan. If the Stage 1 density grading shows you are eligible to take part in Stage 2, you will be invited and can then decide whether to take part or not. 

Do I have to take part?

No, it’s up to you to decide whether to take part. If you do not want a FAST MRI scan or know you cannot have one, then you can let us know you don’t want to take part. Whether or not you choose to take part, be reassured that your clinical care will not be affected. You will still be offered your routine screening mammograms every 3 years until you turn 71.

Stage 2 - Patient Information

Why have I been asked to take part in this study?

Following your first mammogram, we invited you to take part in Stage 1 of the DYAMOND study: to measure your breast density and to check your breast screening results. Your images have now been checked and we think you could be eligible to join Stage 2 of the study to have a FAST MRI scan. 

Do I have to take part?

No, it’s up to you to decide whether to take part. If you choose not to, be reassured that your clinical care will not be affected. You will still be offered your routine screening mammograms every 3 years until you turn 71. 

What does taking part involve?

We have designed the study to be as convenient as it can be, so that as many people can be involved as possible. If you decide to take part, we will:

  • Ask you some questions about your health
  • Check that you can have a FAST MRI scan
  • Book a FAST MRI scan at a time convenient to you
  • Ask you to complete a survey about your experience

Some people may also be invited to take part in an interview about their experience.

We expect a small proportion of people having a FAST MRI scan to be invited for another scan after a year or be referred for further investigations.

What do I do next if I am interested in taking part?

A Research Nurse will contact you to discuss this part of the study and answer any questions you may have. If you would like to join the study, they will ask you some questions about your health to make sure that you are safe to have the FAST MRI scan. They will help you complete an online consent form and book you in for your scan at a time convenient to you. This will need to be between day 6 and 16 of your cycle if you are still having regular periods.

What would stop me from having a FAST MRI scan?

Please let the Research Nurse know if you are affected by any of the below as these things may prevent you having an MRI scan:

  • If you are or may be pregnant or if you are breast feeding
  • If you have ever had a penetrating eye injury
  • If you have ever had brain surgery
  • If you have a pacemaker or defibrillator
  • If you have an implanted neurostimulator
  • If you have a cochlear implant
  • If you have ever had a shrapnel injury
  • If you are claustrophobic
  • If you have had conditions associated with your kidneys
  • If you wear a sensor to measure your blood sugars (e.g. a “continuous glucose monitor”), this will need to be removed for the scan. We will try to arrange your scan around the time when you are due to change your sensor.

What is it like to have a FAST MRI scan?

We encourage you to watch this video to see what it is like to have a FAST MRI scan

Your FAST MRI scan appointment will take up to 45 minutes.

When you arrive, the radiographer will ask some questions to confirm that it’s safe for you to have the scan and ask you to sign a standard safety checklist. 

You will be asked to change into a hospital gown. 

You will have a cannula (a small, soft plastic tube) placed into a vein in your arm. This is necessary so that the radiographer can inject dye during your scan, which makes a cancer show up clearly if it’s there. The injection of dye is not painful. 

The radiographer will explain what is going to happen during the scan, which we expect to take between 3 and 5 minutes.

Once you have had the scan and your cannula has been removed, you will be free to go. Your scans will be sent to specialists who look at them in detail and check the findings. This means we can’t give you the results on the day of your scan.  

How will you get the results of your FAST MRI?

We will let you know the results of your FAST MRI scan 3-4 weeks after your scan date. 

If your scan is clear, you will receive your scan results by letter. 

Some people with a clear FAST MRI scan may be invited to have another scan in a year's time. This is because their scan is most likely normal but we would like to see if it has changed over time, as we are still learning which appearances on FAST MRI we can confidently call “clear”. We expect that all the people invited to have this second scan will then have a clear result.

If your scan shows that further investigations are needed, a Research Nurse will contact you by telephone to explain the results and what will happen next. The Research Nurse will arrange an appointment at the Breast Care Clinic. Appointments are usually offered within about 2 weeks of referral. This does not necessarily mean that you have a breast cancer, just that you need to have additional tests. You will receive a letter confirming the FAST MRI scan results.   

At these appointments a healthcare professional will look at your mammogram and FAST MRI scan results and will ask for more tests to be done, including another scan and possibly a biopsy. If you have a biopsy, we may ask you if we can collect an extra sample to donate to a tissue bank to help support future research. Information about this option will only be sent to you if you need further investigations following your FAST MRI.

They may also discuss your case with a team of other professionals after your appointment to help decide if more investigations are needed, which could include deciding to perform a full MRI. If you do need further tests, your care team will explain why each test is important and what having the test would involve for you. Any extra tests you may have will help the team decide if what was seen on the FAST MRI is a cancer or not.

We expect that if 100 people have a FAST MRI scan, 5 of those people will be called back for further investigations. Of those 5 people, we expect that only around 1 participant will be diagnosed with a cancer.

What are the possible benefits of taking part?

Taking part in the FAST MRI DYAMOND Study gives you access to a new test (a FAST MRI scan).

We do not know if your FAST MRI scan will pick up a cancer that was not found on your first mammogram. If it does, it is possible that you will have a better outcome, because the cancer will have been found earlier than it would have been if you had not taken part in the study. 

By taking part in this important study, you will be making a difference by helping us plan more research to improve breast screening for everyone in the future.

What are the possible disadvantages and risks of taking part?

We expect that the potential advantages of taking part will outweigh any disadvantages or risks.

Having an MRI scan is painless, and it’s one of the safest medical procedures available, but there are some risks. For example, there are increased risks to people with certain implants or foreign bodies. The Research Nurse and Radiographer will ask you questions about your medical history to check that you can have the scan. 

Some patients occasionally experience a tingling sensation or feel hot from being in the MRI scanner. These effects only last a short while and should ease as soon as the scan is over.

The scan involves having an injection of dye which is used to highlight any cancer cells (if a cancer is there). The risks associated with this injection are small and are well known: 

  • About 1 in every 100 people may have a mild reaction to this dye (such as pain at the injection site, nausea or headache)
  • About 1 in 1000 people may experience vomiting and/or an itchy rash   
  • A more severe allergic rection is very rare, affecting about 1 in 10,000 people.  The radiographers who will be looking after you during your FAST MRI scan are trained to support individuals if this happens, and appropriate medical care will be given.  The dye is not recommended for people who are pregnant or breast feeding.
  • Tiny amounts of dye can stay in the body for a long time after the scan but this has never been shown to cause any problems.   

Will my GP be informed that I am taking part in the FAST MRI DYAMOND study?

If you decide to take part in the study, we will let your GP know and we will tell them the results of your scan when they are available.

Expenses and payments

You will not be paid for taking part in the FAST MRI DYAMOND study but reasonable expenses (up to £10) to attend your FAST MRI scan will be covered. Your Research Nurse will give you this information.

Further information about the FAST MRI DYAMOND study

In this study we will use information from you and from your medical records. We will only use information that we need for the research study. We will let very few DYAMOND team members know your name or contact details, and only if they really need it for this study. This includes research staff at Royal Surrey Hospital who are providing the Consent Form website. Everyone involved in this study will keep your data safe and secure. We will also follow all privacy rules.  At the end of the study, we will save some of the data for up to 5 years after the study closes, in case we need to check it and for future research (if you have given us permission). We will make sure no-one can work out who you are from the reports we write. Please contact us on the details below for more information about this. 

This study is run by Dr Lyn Jones (Consultant Radiologist) at the FAST MRI Programme Team at North Bristol NHS Trust.

DYAMOND web banner (1).png

Blood Transfusion Two Sample Rule

Regular Off Off

The Two Sample Rule Myth Buster!

Why are Two Samples Needed?

The most crucial test undertaken in the Blood Transfusion Laboratory is the ABO group.  An error in this test could result in an ABO incompatible transfusion, the consequences of which include organ failure, ITU admission and in 1 in 9 cases, death. 

In 2012, the British Society of Haematology (BSH) and the British Blood Transfusion Society (BBTS) published new guidance on pre-transfusion sampling which stated 2 samples are required to confirm a blood group before group matched units can be transfused.  This was in response to national data from the 2010 Serious Hazards of Transfusion (SHOT) report showing 386 cases of Wrong Blood in Tube (WBIT) occurred that year, each one representing a risk for the incorrect blood component to be transfused.

These samples must be collected as two independent events and following two independent ID checks, for example:

•    Both samples can be collected by one staff member as long as they complete the ID checks fully before each venepuncture, i.e. ask the patient to state their name and date of birth before collecting each sample.  
•    Samples can be collected by different staff members who each conduct their own independent ID checks.  Both staff members being present while one of them asks the ID questions constitutes 1 check.  

How do I know if I need to take 1 or 2 samples?  
ICE will show the request history for your patient.  To make it easier to find, use the ‘Filter by speciality’ box as shown below.  

ICE request history for patient

It’s important to note the patient might have transfusion reports that don’t relate to a blood group – the only tests that count towards the 2 sample rule are Group and Save.  This patient has a lot of requests including several Group and Saves:
 

When not to take a second sample
The patient above has several Group and Save reports visible in ICE, so only needs one sample on this occasion.  Each year the transfusion lab receives around 800 duplicate samples, i.e. a second sample has been collected but isn’t required.  That’s 800 occasions when a patient has been bled unnecessarily, which can be detrimental to patient comfort and has cost implications.  A second sample is only required when there is no historical Group and Save in ICE.  

Screenshot from ICE showing investigation status


How to ensure the sample is accepted by the lab
•    Our primary method for labelling transfusion samples is Electronic Bedside Sample Labelling using the BloodTrack devices.  This must be used in all inpatient areas.  It is quicker and safer than manual labelling but does not replace the verbal ID checks.  
•    Positive patient identification – ask the patient to tell you their name and date of birth if they are able.  
•    Complete the process as instructed on the BloodTrack PDA.  The steps have been carefully designed to promote safe practice.  
•    Complete the patient ID checks, sample collection and printing at the bedside without leaving the patient.
•    Ensure the request form is completed fully and the details on the sample match the form.
•    BloodTrack will print the details on the wristband – if the label that comes out the handheld printer is incorrect, that means the wristband is incorrect.  
•    ICE numbers cannot be used as an MRN under any circumstances.
•    Do not pre-print labels or retain unlabelled samples


Do not try to ‘cheat’ the Two Sample Rule
The rule is in place to protect patients.  In a dire emergency where taking 2 samples will delay patient care the transfusion lab will issue emergency group units. This is for emergencies only and not for routine use because the supply of emergency units is not infinite.  Inappropriate/avoidable use of emergency red cells must be reported to SHOT, therefore the lab will follow up on all emergency stock usage. 

Managing at home with your arm in a polysling after shoulder surgery

Regular Off Off

Introduction

This page aims to inform you how to manage your everyday activities at home with your arm in a polysling following shoulder surgery. Each person’s operation is individual and you may be given specific instructions that aren’t in this page. 

Restrictions in movement following shoulder surgery

You may be told to restrict movements of your shoulder after surgery. This depends on what operation you have. Make sure you keep to the instructions given to you to avoid causing damage to the shoulder operated on.

This page covers several activities of daily living to show how you can manage within your shoulder restrictions.

How to fit the polysling

Photo 1 is what the polysling looks like when not fitted. 

Polysling and attachable waist belt
Photo 1

1. The polysling is made of lightweight foam. Most people find it comfortable to wear when fitted correctly. It is made up of a trough that your forearm sits in, supported by straps. It works by supporting your arm in a position to immobilise your operated shoulder (stop it moving). 


Person with arm in polysling trough, supporting wrist with other hand
Photo 2

2. If someone is fitting the sling for you, support your operated arm with your elbow bent to 90 degrees (a right angle) using your unoperated arm. Slide the “trough” part of the sling in from behind so that your elbow fits snugly into the corner. See photo 2.


Person with arm in polysling trough, resting on table
Photo 3


3. If you are fitting the sling without help, sit down, with your elbow bent to 90 degrees (a right angle). You will find it more comfortable if your arm is supported on a pillow. Then slide the “trough” part of the sling in from the side and ensure that your elbow fits snugly into the corner. See photo 3.


Person with arm in polysling trough, resting on table, fastening strap near elbow
Photo 4

4. Fasten the strap nearest to your elbow across your forearm, it should be approximately one inch below your elbow crease. It attaches with Velcro. See photo 4.


Person with arm in polysling, resting on table, fastening strap near wrist
Photo 5

5. Attach the wrist strap approximately one inch from your wrist (towards your elbow). It attaches with Velcro. The lower ‘D’ ring should rest against your body and the upper ‘D’ ring should face upwards. See photo 5.


Person adjusting polysling shoulder strap
Photo 6

6. The shoulder strap is the long strap that is sewn to the “trough” part of the sling at the elbow end. Take this strap across your back and over your unoperated shoulder. See photo 6.


Person with arm in polysling, resting arm on table, adjusting shoulder strap through D rink attached to trough
Photo 7

7. Feed the shoulder strap through the upper ‘D’ ring on the wrist strap. See photo 7.


Person wearing polysling attaching shoulder strap to itself with Velcro
Photo 8

8. Attach the shoulder strap back onto itself with the Velcro. See photo 8.


Person wearing polysling attaching waist strap to wrist end of trough
Photo 9

9. If you are told to wear the waist strap, feed the other long strap through the lower ‘D’ ring and attach it onto itself with the Velcro tab. See photo 9.


Person wearing polysling attaching waist strap to elbow end of trough
Photo 10 

10. Take the waist strap around your back and attach it over the front of the elbow section of the sling. Adjust as necessary so that your arm is held snugly against your body. See photo 10.


Person wearing polysling with wrist slightly elevated

11. The final position should have your arm held close to the front of your body with your knuckles facing forwards. Your wrist should be slightly higher than your elbow to prevent any swelling in your hand. See photo 11.


You will need to be able to take your sling on and off for physio exercises and, if you are allowed, for washing and dressing.

Dressing techniques

Getting dressed if you are allowed to move your shoulder (within restrictions)

If you are told you can move your shoulder within restrictions, you can carefully dress and then put the polysling over the top of your clothes using the following method: 

Person sitting on chair with arm hanging down to the side
Photo 12

1. Remove the polysling and let your operated arm hang down to your side. You may find this easier if you sit down. See photo 12.


Person with arm hanging down by side, opposite hand to feed sleeve onto hanging arm
Photo 13

2. Using your unoperated arm feed the sleeve of the garment onto your operated arm all the way up to your armpit. See photo 13.


Person with arm hanging by side, using opposite hand to pull clothes over shoulder
Photo 14

3. Do not use your operated arm to help. Your unoperated arm should do all the work. See photo 14.


Person putting with sleeve on one arm pulling clothes across the back
Photo 15

4. Next use your unoperated arm to bring the garment across your back. See photo 15.


Person pulling clothes onto unoperated shoulder
Photo 16

5. Put your unoperated arm into the other sleeve of the garment. See photo 16.


Person wearing jacket with one arm hanging by the side, opposite hand doing up zip
Photo 17

6. Use your unoperated arm to fasten the front of the garment. See photo 17.  Do not use your operated arm to help as you may move your shoulder too much and cause damage to the surgery on your shoulder.


Person putting on t-shirt with one arm hanging by side and opposite hand pulling neck opening over head
Photo 18

7. If the garment does not open at the front, use the method in steps 1 and 2 to feed the sleeve of the garment onto your operated arm. Then use your unoperated arm to put the garment over your head. See photo 18.


Person putting on t shirt with one arm hanging by the side, opposite hand coming through sleeve hole
Photo 19

8. Put your unoperated arm into the other sleeve of the garment. See photo 19.


Person putting on t shirt with one arm hanging by the side, opposite hand pulling down garment
Photo 20

10. Use your unoperated arm to pull the garment down over your body. See photo 20.


Once you are dressed you should put the polysling back on straight away unless you have been told that the polysling is for comfort only.

To get undressed you must use the reverse of the above method: take your unoperated arm out first then slide the garment off your operated arm as it hangs to your side.

Do not move your operated shoulder or arm to help take the garment off. Your unoperated arm should do all the work.

Getting dressed if you are not allowed to move your shoulder

Person wearing t shirt over arm in a polysling

If you are told that you must not move your shoulder for a period after your surgery you must dress over the top of the sling. See photo 21.

This means you will need loose fitting clothes so that your arm will fit inside the body of the garment. If you wear a bra, you will not be able to wear one with straps as you will not be able to move your shoulder to put your arm into the straps. You may be able to feed a strapless bra under your operated arm and fasten it with help.

Suitable clothing

Try to have loose/baggy clothing available for after your surgery as dressing will be more difficult due to your shoulder restrictions. As a general rule - the looser the clothing, the easier it will be to get dressed and undressed.

Some people find that front fastening tops are easier than tops that go over the head. Choose upper and lower garments with easy fastenings. Shirts and blouses with large buttons will be easier to do up one-handed than small buttons.

Zip up cardigans or coats are very difficult to do up one handed so avoid them. Trousers or skirts with elasticated waists will be easier to manage than buttons, zips, and belts.

Wear slip-on or Velcro fastening shoes as you will not be able to fasten lace-up shoes one-handed.

Washing techniques

Washing if you are allowed to move your shoulder (within restrictions)

Person demonstrating washing technique, operated arm hanging by side and opposite hand holding washcloth
Photo 22

You can carefully remove the polysling to wash. You should keep your operated arm by your side and you can have a shower or a bath if you feel safe to do so. Your surgical wound should be covered with a shower-proof dressing but do not run the shower directly over the dressing, or soak it in the bath. Do not use your operated arm to help wash yourself as this may cause damage to the surgery on your shoulder.

You can then wash your armpit with a flannel or sponge. You can also lean forward to access your armpit to apply deodorant. See photo 22.

You may wash your hair in the shower or by leaning over a sink or bath. Do not use your operated arm to help wash your hair. Some people need assistance to wash their hair.


Washing if you are not allowed to move your shoulder at all

In some cases you may be told to keep the sling on at all times. This means washing around the polysling with a flannel or sponge. To wash your armpit of your operated side you can slide a thin flannel or a wet wipe under your armpit. Do not attempt to move your arm away from your body to get access to your armpit as this may cause damage to the surgery on your shoulder. You will not be able to apply deodorant to your armpit, but can apply it around the area (taking care to avoid your surgical wound).

To wash your hair you can lean over a sink or bath/shower whilst keeping your arm within the polysling. Take care to keep the polysling dry. Do not use your operated arm to help wash your hair. You may find that dry shampoo is a useful alternative for a short period. Some people need assistance to wash their hair.

One handed washing advice

  • Use liquid soap from a dispenser if you find it difficult to handle a tablet/bar of soap.
  • Use a flannel mitt with soap inside.
  • A sponge lathers easier than a flannel and is easier to squeeze out after use.

Sleeping

You will need to wear your polysling to sleep in unless you are advised otherwise. The most comfortable positions for sleeping or on your back or un-operated side. Use pillows or cushions to support your operated arm and shoulder in a comfortable position. 

Going to the toilet

  • Wipe yourself with your un-operated arm.
  • Adjust your clothing with your un-operated arm.

Cleaning your teeth

Putting toothpaste on a brush one-handed can be difficult. The following technique can be easier:

  • Position the toothbrush on its back on the sink with bristles facing up. If it will not stay in position you can secure it with a piece of “blutack” or grip the toothbrush between your knees.
  • Use your unoperated hand to squeeze toothpaste onto the brush.
  • A pump type dispenser may be easier to use than squeezing a standard tube of toothpaste.

Kitchen activities

If you have no-one at home to help you in the kitchen try to opt for meals that will be easy to prepare one-handed.

Here are some tips:

  • Ready meals can be easily put into the oven on a baking tray or into a microwave on a plate.
  • Pre-prepared fresh or frozen vegetables are available in many shops to prevent the need to wash, chop, or peel vegetables.
  • When cooking vegetables avoid carrying a whole pan of boiling water one-handed. Instead put the vegetables in a frying basket within a saucepan. They can then be lifted out and drained in one movement. Alternatively take the vegetables out with a slotted spoon. Once the saucepan of water has cooled it can be tipped away.
  • Remember most tin openers require two hands to operate. You may need to get someone else to open tins for you or look into buying an electric one-handed tin opener.
  • Scissors can be useful for opening awkward packets.
  • To open jars, grip the jar between your knees and twist the lid off with your unoperated hand. If you have help from other people ask them to loosen very tight lids and transfer the contents of the jar into an easy open plastic storage container.

If you are concerned about managing kitchen activities and have no-one to help you, please ask to see the Occupational Therapist about gadgets to make life easier

Eating

You will need to eat one handed. Here are some tips: 

  • Eating out of a bowl may be easier than a flat plate to prevent food being pushed off the edge of the plate.
  • Choose foods which are easy to cut up one-handed.
  • Using a spoon may be easier than a fork.
  • Put a slightly damp folded cloth under a bowl or plate to stop it sliding around the table top.

If you are concerned about eating and have no-one to help you, please ask to see the Occupational Therapist for advice.

Extra help

If you are concerned that you will not be able to manage your everyday activities and have no-one to help you, you may need a referral to Community Services for help at home.

If you are assessed as needing it, Community Services can provide assistance with washing and dressing, shopping, laundry and meals (usually from the Community Meals service). They cannot provide help with general cleaning/housework.

If you feel you need a referral for Community Services please alert the nurses or Occupational Therapist in hospital. 

Caring for another person

If you are a carer for someone else and you will not be able to meet their needs after your shoulder surgery, you will need to make arrangements for their care yourself. The hospital cannot arrange help for anyone who is not a hospital inpatient.

Summary

This page should have provided you with some useful information to help you manage at home after your shoulder surgery.

If you have further questions please ask your consultant, nurse or Occupational Therapist.

Occupational Therapy Service
Southmead Hospital
Westbury-on-Trym
Bristol
BS10 5NB

07912 780 031

© North Bristol NHS Trust. This edition published November 2024. Review due November 2027. NBT002334

Clinical Biochemistry Test and Platform Changes

Regular Off Off

Test accreditation

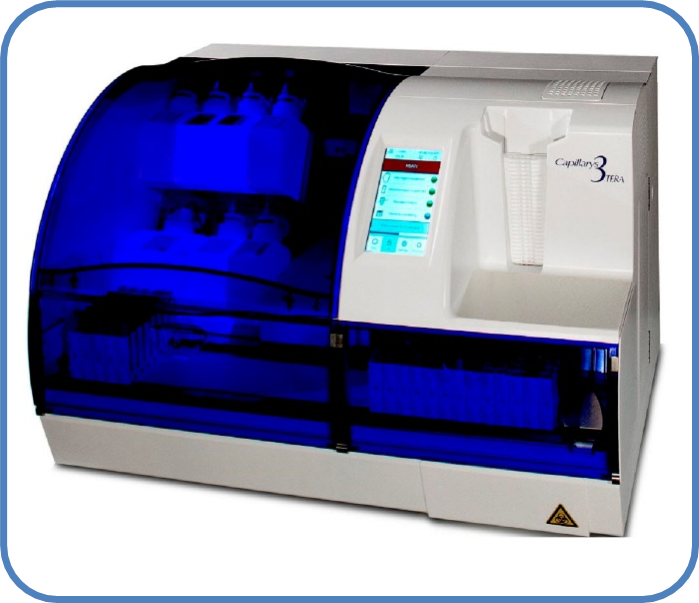
Clinical Biochemistry has had the automated Beckman platform since November 2022 for the majority of our Biochemistry assays. As new tests come on line we will update both our test information pages Test Information and the quality section Pathology Accreditation and Compliance Status with details of assays affected.

All the tests, which were previously accredited by UKAS, will be going under an Extension to Scope process. However, please be assured that the quality of our services will remain the same.

If you have any concerns or queries, please contact us (contact information in the box below). 

Test Information

Sample vials for testing

Includes details of sample types, volumes, special precautions, turnaround times & reference ranges.

Contact Clinical Biochemistry

Department of Clinical Biochemistry
Pathology Sciences Laboratory
(Blood Sciences and Bristol Genetics)
Southmead Hospital
Westbury-on-Trym
Bristol BS10 5NB

Helpdesk: 0117 4148383

Duty Biochemist: 0117 4148437

Email: BloodSciencesAdmin@nbt.nhs.uk

Pulmonary Rehabilitation

Regular Off Off

Pulmonary Rehabilitation (PR) is aimed at people who have breathing difficulties caused by a lung condition, which affects their ability to do normal activities. PR is an exercise and education programme designed to help you live better with your breathing problems.

Your age and the severity of your condition will not stop you from taking part in PR, or from seeing an improvement. Completing a course of PR is a good way to learn how to increase your activity levels and exercise at the right level for you in a safe and sociable environment. Research tells us that PR leads to improvements in your ability to walk further and in your quality of life. PR should help you to feel less breathless doing day-to-day activities, such as walking, climbing stairs or inclines, shopping and dressing.

It helps you by:

  • Helping you to manage your breathlessness. 
  • Making you fitter. 
  • Reducing anxiety and depression. 
  • Improving your quality of life.

It does this by:

  • Exercise - the exercises are designed to strengthen your muscles, and therefore improve your fitness and help your breathing. 
  • Education - this covers a wide variety of topics, helping you to understand how to live with and manage lung disease.
  • Support - Pulmonary rehabilitation gives you a chance to meet others in a similar situation and share experiences. There is access to a range of healthcare professionals who specialise in breathing problems. 

Any health professional can refer you to PR. There are 2 teams that provide PR in this area:

  • LEEP (Lung Exercise and Education Programme) - runs at Cossham Hospital on Tuesday and Friday afternoons with input from the Respiratory Consultant team and other healthcare professionals from Southmead Hospital. 
  • Sirona Pulmonary Rehabilitation Programme - runs in various locations across Bristol, North Somerset, and South Gloucestershire.

You can attend whichever programme is most convenient to you. 

Wherever you attend PR, you will do 2 sessions per week, for 6 weeks, with each session lasting for up to 2 hours. 

Following referral you will be invited to an ‘Opt-in’ session at your local venue. This is a group session aimed at providing you with detailed information about the programme, the likely benefits to you and the options available, before you decide if you would like to participate and where you would like to do the programme.

Following Opt-in, an individual assessment will be booked for you with your chosen pulmonary rehabilitation venue.

How to contact us

LEEP Lung Exercise and Education Programme (LEEP) 
Physiotherapy Department 
Cossham Hospital 
Lodge Road 
Bristol 
BS15 1LF 
LEEP@nbt.nhs.uk 
0117 414 2010

Sirona Pulmonary Rehabilitation Community Respiratory Specialist Team 
Sirona Care & Health CIC 
New Friends Hall 
Heath House Lane 
Bristol 
0300 124 5909 
Respiratory – Sirona care & health NHS services

© North Bristol NHS Trust. This edition published July 2024. Review due July 2027. NBT002775

Ultrasound-guided pleural biopsy

Regular Off Off

This page describes a pleural biopsy procedure. If you have any further questions or concerns, please contact the team who organised your biopsy.

Important information about your procedure

  • Please report to your appointment with this information leaflet (see opposite date, time and location). Please ensure you leave enough time for your journey to the hospital.
  • Please tell the doctors and nurses looking after you about any medical conditions you have, and bring a list of all the medication you take with you.
  • Please tell us if you take any medication to thin the blood – these may need to be stopped before your procedure. See page 4 for more details on when to stop your blood thinners. You must continue to take any other medication as normal.
  • If you have been told by your doctor that you may be able to go home the same day after your procedure, please ensure someone is able to bring you into and take you home from the hospital.
  • Please seek medical advice if you develop any shortness of breath or increasing chest pain at home after your procedure.

You may be asked to sign and date to confirm that you have read this information in full. You will have the opportunity to discuss any questions you might have about the procedure, or any other aspects of your treatment, with a doctor when you come to hospital for your appointment.

What is an ultrasound guided pleural biopsy?

The pleura is a thin membrane that lines the inside of your chest cavity. Some patients have thickening of this lining and require a small sample (a biopsy) be taken to help identify the cause. Before the biopsy is taken, the area will be cleaned and local anaesthetic will be injected to numb the surface of the chest wall. A needle can then be targeted, with the help of an ultrasound machine, to take a biopsy from the pleura. Your doctor may take several biopsies to give you the best chance of a diagnosis. We then analyse these samples in the laboratory to try and get a diagnosis.

Diagram of chest indicating trachea, pleura (lung lining), lung, and pleural effusion

Why do I need an ultrasound guided pleural biopsy?

Your doctor has recommended a pleural biopsy as the best way of finding out what is causing your illness. Your doctor will have considered this carefully and made their decision with your best interests in mind. However, it is ultimately your decision as to whether or not you wish to have the procedure done.

If you have any concerns or questions, please let your doctor know and they will be happy to discuss things with you in more detail.

How should I prepare for my pleural biopsy?

Please make sure we have your correct phone number(s) as we may need to call you a few days before your procedure to confirm arrangements and that you are still able to come to hospital. If we are unable to contact you, we may offer your appointment to another patient who is waiting for this procedure.

Please let us know in advance if you are:

  • Pregnant.
  • Taking medication to thin your blood

If any of these apply to you, we will need to make special arrangements for your procedure. These may include instructions as to what you should do with your medication.

Please bring the following items with you on the day of your procedure:

  • All your medications (we need to know what you are taking, including prescription and “over the counter” treatment).
  • Reading glasses, if you need them.

What should I do with my medications?

It is important to let us know in advance if you are taking medication to thin the blood. These will need to be stopped temporarily before your procedure can go ahead. Your procedure may need to be cancelled if you do not follow these instructions.

Please take your other medication as normal.

The table below explains what you should do with your medication in more detail. Please contact your doctor if you are not sure what to do. If your blood thinning medication cannot be stopped then your doctor may change it to an alternative medication temporarily, to enable the procedure to take place.

MedicationInstructions
WarfarinStop 7 full days before your procedure. You will need to have an INR blood test with your GP or at the hospital 1-2 days before your procedure to make sure your INR is less than 1.5; otherwise we may need to cancel your procedure.
Aspirin 75mgCan continue before your procedure. 

Clopidogrel (Plavix)

Dipyridamole (Persantin) 

Ticagrelor (Brillique)

Stop 7 full days before your procedure.

Apixaban (Eliquis) 

Dabigatran (Pradaxa) 

Edoxaban (Savaysa)

Rivaroxaban (Xarelto)

Stop 2 full days before your procedure.

Dalteparin (Fragmin) 

Enoxaparin (Clexane)

Tinzaparin (Innohep)

Stop 1 full day before your procedure.


What will happen on the day of my procedure?

You will be greeted by a member of the team who will check your observations (e.g. heart rate, blood pressure, temperature) and go through a checklist with you. This will include questions about your medical history, medications, and allergies.

A member of the team may take some blood for tests if these have not been checked in advance. The procedure itself takes place in a procedure room or theatre. The procedure will be explained to you in more detail, and you will be asked to sign a consent form to confirm you are happy to go ahead.

A doctor will do an ultrasound scan of your chest to help decide where to sample the pleura. This involves placing gel and a hand-held probe over your skin to create a picture on a screen. The ultrasound scan should not be painful and does not involve any radiation. The doctor will then inject local anaesthetic into your chest wall – this may sting at first, but will soon numb the area so you should not feel any pain during the procedure.

Once the area is numb, the doctor will make a small incision and then insert a needle into the pleura to take a sample. Your doctor may take multiple samples from this site to improve the chances of getting an answer. With each biopsy, you will hear a loud ‘click.’ After the samples are taken, a plaster will be placed over the site. There is rarely a need for a stitch.

The whole procedure usually lasts between 30 and 60 minutes in total.

What are the risks of the procedure?

A pleural biopsy is generally a very safe procedure, and serious complications are rare.

  • Pain: most people (1 in 2 patients) will experience some pain in association with the procedure, but this is rarely severe. There is likely to be discomfort associated with the local anaesthetic and after the procedure the site may feel bruised. It is normal for your chest to be sore for a week or so after your procedure; this can be managed with simple painkiller (such as paracetamol).
  • Infection: there is a low but important risk of infection following a pleural biopsy (less than 1 in 100). This can usually be treated with antibiotics, although it may sometimes need a chest drain to be inserted (a small tube) to empty the chest cavity of any infected fluid and therefore, can result in a hospital stay. Very rarely (1<1000 patients), infections can be more serious and need surgical treatment (an operation). Your doctor will take precautions during the procedure to ensure that this risk is minimised.
  • Bleeding: a small amount of bleeding at the site of the procedure is normal. However, a small number of people have significant bleeding during their procedure (1 in 500). This can usually be managed at the time of the procedure, but very rarely another procedure might be required to stop the bleeding (including surgery).
  • Pneumothorax (collapsed lung): while your doctor uses the ultrasound scanner to locate the pleura for the procedure, they will also be checking to see where the lung is. However, there is a slight risk that the needle used to take a sample of the pleura punctures the lung, causing it to collapse down. If there is no fluid the risk is around 4 in 100, however this is likely to be much lower in the presence of fluid as in your case. This is called a pneumothorax. This usually doesn’t need any extra treatment but, around 5% of the time a chest drainage tube, pleural vent, or needle will need to be inserted to allow the lung to re-expand. This may require a hospital stay. Even more rarely, if the tube doesn’t fix the pneumothorax, the collapsed lung needs to be treated with a surgical operation.
  • Damage to surrounding structures and organs: there is a very small risk that other nearby structures or organs (such as the diaphragm or liver) could be damaged during the biopsy procedure. However, the use of ultrasound to find a suitable and safe site makes this extremely unlikely.
  • Failure to get a diagnosis: there is no guarantee that the biopsy will give an overall diagnosis. If the biopsy does not provide an answer as to the cause, your doctor will discuss what further investigations might be needed with you
  • Death: the risk of death from an ultrasound guided pleural biopsy is very, very rare indeed (less than 1 in 1000).

What happens after the procedure?

After the procedure a member of the team will take you back to the observation area, where you will have your observations (blood pressure, oxygen levels, heart rate and temperature) checked again. The team will also arrange for you to have a chest X-ray. If you are in any discomfort, we will give you painkillers to manage this. You must let your nurse and/or doctor know if your chest becomes increasingly painful or you feel increasingly short of breath. If you feel well and your chest X-ray is ok you will be allowed to go home. We would expect everything to be completed in around half a day.


When will the results of my procedure be available?

It will take 1-2 weeks for the results of your pleural biopsy to be ready. This is because it takes time for the specimens to be analysed. You will be given an appointment with the team who organised the biopsy to discuss the results with a doctor about 2 weeks after your procedure. Please contact your lead consultant’s secretary one week after your procedure if you have not received an appointment. 

How do I contact you?

If you have any questions or concerns, please contact 0117 414 6322 or the team who organised your biopsy.

In the event of an emergency, please contact your on-call GP or NHS 111 for further advice.


Authors: 

Dr Helen McDill, Dr Amelia Clive, Dr Rahul Bhatnagar (Respiratory SpR and Consultants, Respiratory Medicine, North Bristol NHS Trust)

Acknowledgements: 

Dr Lindsey Taylor, Dr John Corcoran, Dr Cyrus Daneshvar (Consultants, Respiratory Medicine, UHPNT)

© North Bristol NHS Trust. This edition published January 2024. Review due January 2027. NBT003408