NBT Volunteer Profiles
We have spoken to some of our volunteers who have supported us throughout the pandemic to hear about their achievements, memorable moments and challenges.
Moss Thompson- Move Maker
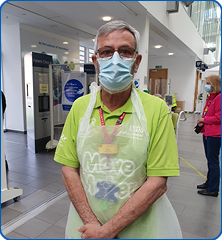
What is your volunteer role/roles within NBT?
I’m a Move Maker
How long have you volunteered in this role?
Seven years. It was only supposed to be for 3 weeks, but here we are, 7 years later!
Why did you decide to start volunteering here?
I used to work here. I wasn’t quite ready to retire so I thought I’d come and help out for 3 weeks, and then it just grew from there. We built up a good team, it’s a good atmosphere and we feel we’re doing a good job helping the public, so that’s why we come here really.
What would you say is the most rewarding part of this role?
Seeing the reaction from people as we do our job. Obviously, that isn’t always the same, but generally, people are in a good mood and it’s nice to come in and meet the team and seeing the reaction as we do our job is rewarding.
And what would you say is challenging?
Sometimes you get people who aren’t in such a good mood, which is understandable, we just remember the reason that they’re here and do our best to help as much as we can, but obviously there is a limit to how far we can assist as Move Makers.
Is there a particular moment / story that really stands out to you from your time volunteering in this role?
I drive the buggy and there are seat belts in the back. Sometimes when I’m asked “Do we have to belt up?” I have a bit of a laugh and say “No, you can talk as much as you like!”
If you were stood down during the pandemic, what did you miss most about volunteering whilst you were not able to be with us?
I was stood down twice. I came back in September 2020 but was stood down again when Covid cases started to rise again. I just missed doing the job really –being able to come in and do what we do.
If a friend / family member was interested in volunteering with NBT, what advice and encouragement would you give them?
I’d tell them what we do and what we’re about and I’d advise them to fill out the forms and to come and see Jill [Jill Randall, Move Maker Volunteer Manager].
Casper Turner- Move Maker
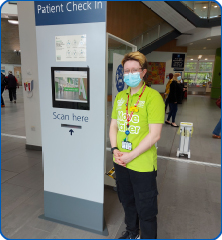
What is your volunteer role/roles within NBT?
I’m a Move Maker – I volunteer at the Patient Check In kiosks.
How long have you volunteered in this role?
I started in January 2021.
Why did you decide to start volunteering here?
I’ve always been interested in volunteering in a hospital. When I was younger, I had to come into hospital for a big leg operation, so I always was really interested in how things work in hospital. When you come as a patient, you see little snippets of different areas, so I wanted to get a bigger picture of what other things happen and how it all works. As a volunteer, you get a much bigger picture – especially as a Move Maker, you meet all different kinds of staff. We talk to doctors, to nurses, to radiologists, pharmacists, to reception staff to admin staff; there is so much going on and it’s really nice to be able to get a bigger feel for everyone who is in the hospital and what’s happening and see the patient process.
What would you say is the most rewarding part of this role?
When patients come back through after they’ve been to their appointment and they thank you for helping to check them in, or to get them to their appointment on time or to take people in wheelchairs down to the different gates – when they thank you for making that part of their day easier, it does just feel really good and you feel really proud of yourself, really valued and glad you’ve been able to help. Another thing I really liked was that when we were doing the Patient’s Belongings service before visitors were allowed back in, to take things up to wards for patients, sometimes people were also bringing in little gifts for the staff , to thank them, and it was always really nice to be the messenger there and be the person passing that message of thanks on.
And what would you say is challenging?
Sometimes it can be challenging if people don’t understand why they have to go to a specific area first, or if they have been told they’re going to one place, but when they’re checking in the system will say that they’re going to a different place. Often, that’s because at the moment some things are being moved around because of the pandemic and we have the admissions lounge so that we can bring people in through a different hospital entrance; so people can get a bit confused and that can be a bit challenging trying to support where people are getting to. But I think I’ve picked up where things are in the hospital and what areas of the hospital various things are located at, so while it’s a bit challenging, it’s getting easier every time I come in.
Is there a particular moment / story that really stands out to you from your time volunteering in this role?
In one of the earlier weeks, when I had only recently started volunteering, someone came up to me and they were a bit lost and overwhelmed, so I helped them walk to where they needed to be and chatted with them for a little while to help reassure them and help them calm down and I helped them to check in. That was a really stand out moment for me as I went home and thought to myself “I really made a difference to that person’s day!” –if I hadn’t been there, they would have found the whole experience a lot more challenging and I really helped them through a stressful situation.
If a friend / family member was interested in volunteering with NBT, what advice and encouragement would you give them?
I’d absolutely recommend it! I’d tell them that it’s a really worthwhile thing to do. I don’t see it as being like ‘Ah, I’ve got to go to work’; it doesn’t feel like that at all. It feels exciting – something I really look forward to as there’s always something new happening every week. I’d say it’s a really, really good thing to do, to feel like you’re helping the community and also it does just feel like something to look forward to and something that makes you feel good at the end of the day.
Chris Lindop- Move Maker
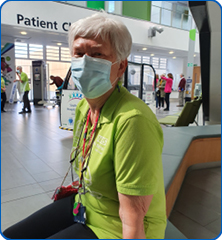
What is your volunteer role/roles within NBT?
I’m a Move Maker
How long have you volunteered in this role?
Since the beginning – 7 years now.
Why did you decide to start volunteering here?
I live very close by. I saw a notice in the surgery, and I thought “Oh, that sounds interesting!” as I’d retired, and I had some spare time. It was advertised for 3 weeks, and I thought I could manage that…7 years later, I’m still here!
What would you say is the most rewarding part of this role?
Making people feel better. So many of the people who come through those doors are either ill or in pain or late or worried or any number of things, and we hope to be a relief for them and a friendly face who can go “How can I help?”. It makes such a huge difference to people and that’s brilliant.
Is there a particular moment / story that really stands out to you from your time volunteering in this role?
Something I’ve really enjoyed here is that very occasionally, you get someone who has had to come to hospital on their birthday. With their permission, we support them to do check in, including their date of birth, and sometimes you think “Hang on a minute, that’s today!” so we’ve sung Happy Birthday to them and it’s nice as it’s not ideal to be in hospital on your birthday. There have been patients I’ve taken down to their particular gates and tipped them off that it’s their birthday so they’ve made a fuss of them there as well.
Another one that really stuck with me was someone who I’d sat and chatted with while they were terribly upset. They came back with a box of chocolates to thank me and I was really touched. They’d obviously been really grateful for my help.
If you were stood down during the pandemic, what did you miss most about volunteering whilst you were not able to be with us?
I was stood down in October 2020 and came back in April 2021. I missed seeing the rest of the Monday morning team and chatting to them. It’s a very good team, we have a lot of fun together and I always look forward to coming in on a Monday morning and catching up with them all. Also, I missed just being in touch with other people. If it’s just two of you at home sort of treading on each other’s toes all day, it’s a relief to come out and have other people to talk to.
If a friend / family member was interested in volunteering with NBT, what advice and encouragement would you give them?
I’d say go for it! I think you get so much from doing this. It’s a reason to get out of bed at a reasonable hour, which doesn’t happen very much for retired people. It’s great to have contact with so many other people and feel you’re doing something, especially as there’s not very much else you can do at present. But even in ‘normal’ times, it’s a help.
John Evans- Move Maker and Response Team
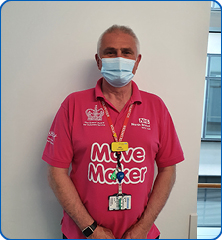
What is your volunteer role/roles within NBT?
I volunteer as a Move Maker on Tuesdays and Wednesdays and on Fridays I’m on the Response Team. I also volunteered at the vaccination hub.
How long have you volunteered in this role?
Since April 2020.
Why did you decide to start volunteering here?
My wife was already volunteering as a Move Maker and told me how badly the Move Maker team’s numbers were affected by Covid 19 as many Move Makers had been advised to shield and could no longer come in. She suggested I came in to help.
What would you say is the most rewarding part of this role?
You get to meet some really nice people who are grateful for your help . Over the time I’ve been here, I’ve seen the progress and change in some of the patients who have still been regularly attending hospital – going from wearing full respirators to now being able to wear a normal mask – it’s really nice to see.
And what would you say is challenging?
Sometimes people who are feeling stressed and anxious about coming to hospital are less tolerant than they might usually be and that can be a bit challenging. It’s also hard when families are called in to see a patient at the end of their life and then when they arrive, they’ve just missed seeing them.
Is there a particular moment / story that really stands out to you from your time volunteering in this role?
When Covid 19 numbers were still really high , I dropped some medication off at ICU for a patient who was being discharged to take home. Watching them being wheeled out, it was just really nice to see a patient leaving ICU having recovered. Another time, there was a patient who had quite a story and was having regular appointments here. It was great to see them progressing. In hospital, everyone has a story and it’s good hearing them and chatting to patients.
If you were stood down during the pandemic, what did you miss most about volunteering whilst you were not able to be with us?
I was never stood down. I started volunteering because of the pandemic and have continued to volunteer right through.
If a friend / family member was interested in volunteering with NBT, what advice and encouragement would you give them?
I would tell them that volunteering has been very rewarding and helps us as much as we’ve helped everybody else. Instead of being at home worrying and having nothing to do, it gave me something valuable to do and keep my mind off the pandemic. It has its highs and its lows, but it’s always a bit of fun! I also have now got the skill and experience of driving the buggy!
Anything else you’d like to say?
There was lots of camaraderie amongst the volunteers during Lockdown 1, when it was very quiet and volunteer numbers were very low as so many were shielding. I got to feel part of the team and meet some interesting people that I wouldn’t have otherwise.
Lesley Roper- Move Maker and dog walker
What is your volunteer role/roles within NBT?
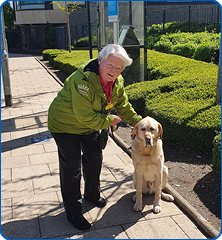
I’m a Move Maker, but from March 2020, I didn’t feel I could do the full Move Maker role, so I slipped into doing ‘Walking a Dog!’
The dog I walk is a guide dog, and his visually impaired owner comes in for treatment 3 times a week. Because of the length of treatment alongside travelling time either side, the dog needs a comfort break and a bit of stimulation.
Prior to Covid, I’d already been walking this dog once a week for a couple of years, but the lovely people who had been doing the other two days had to shield, so I took it on 3 times a week from there!
How long have you volunteered in this role?
I’ve been doing dog walking for a couple of years now but I’ve been a Move Maker since the beginning, so 7 years.
Why did you decide to start volunteering here?
I worked for the NHS for 33 years and then I retired. I had been involved a little bit in the planning of this building in my previous role and at first it was only going to be for a few weeks, plus I was very nosy about what it was actually going to be like, so I thought the best way was to volunteer, see some old friends, catch up with acquaintances and take it from there.
What would you say is the most rewarding part of this role?
I think it’s if you can take away one tiny little bit of anxiety for a patient, however that is. Whether it’s just being in the right place at the right time, knowing where to go, whether they can find the loos, whether they need assistance to get there – all of those little anxiety things – you can’t do the clinical, but you can just take down that one notch of anxiety; it’s better for the patient.
And what would you say is challenging?
Sometimes, the people that are coming in are anxious or uncertain about what’s going and that can come across as quite challenging behaviour, and it’s about understanding that it’s not that they’re getting at you; it’s the circumstances.
Is there a particular moment / story that really stands out to you from your time volunteering in this role?
Thinking with the dog theme again, there was a visually impaired person who used to come in with a guide dog. We would coordinate the visits to help them get where they needed to be and they were just so grateful.
If you were stood down during the pandemic, what did you miss most about volunteering whilst you were not able to be with us?
I changed roles last March as I didn’t feel I could keep doing the full Move Maker role and come in and do a 4 hour shift. I’d had pneumonia 10 years go – I probably would have been fine but I thought rather than doing that, I’ll switch to walking the dog 3 times a week so I could still be a help to everybody, but with less risk. I missed the team because that’s one of the things when you go from working to being retired; you miss being part of a team with a common goal. So catching up once a week and having a bit of a chat is very important and I think that’s something about being a volunteer that’s really of value: being part of that team.
If a friend / family member was interested in volunteering with NBT, what advice and encouragement would you give them?
I’d say go for it! There are lots of different roles. Some people see the Move Maker role as maybe not for them, because it can be physical if you’re asked to push out patients in wheelchairs or whatever and being that meet and greeter isn’t suited to everybody’s personality. Some people prefer to work in areas where they can get to know staff on a ward and get to know a group of clients and patients and that would suit them better. But there are so many different roles, and especially in the recent times it puts structure into a week when so much else has been changing. To have that one day a week, or even a few hours, where you know exactly what you’re doing each week has been very good during lockdown.
Anything else you’d like to say?
I was nominated for an NBT Heroes award, but honestly, all of the volunteers are working really hard – lots of people have done a lot more than I have!
El Green- Antenatal Clinic Meet & Greet
What is your volunteer role/roles within NBT?
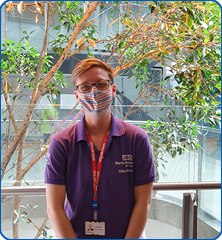
I work on the Antenatal Clinic as a Meet & Greet volunteer, so I meet all of the patients and their partners when they come into the ward; ask them to sanitise their hands and wear a face mask, and answer any questions they’ve got if I can, or direct them to where they need to ask if I don’t know the answer. At the beginning of the pandemic, I was explaining when partners could and couldn’t come in and where they had to go, but now partners are allowed in for everything so my role has changed a bit.
How long have you volunteered in this role?
Seven months; since October 2020.
Why did you decide to start volunteering here?
I always wanted to volunteer generally; I’ve volunteered in some capacity since I was about 15. I really liked the role and the idea of being involved in the hospital. I also want a career in healthcare so I thought it would be a really good starting point to build communication skills and patient contact as well as just giving back to the community in some way.
What would you say is the most rewarding part of this role?
The interactions with the patients. Sometimes we have a good laugh whilst they’re waiting to go in and some of the things that they tell me can be really touching.
And what would you say is challenging?
Dealing with little bits of conflict at times, particularly around hand sanitiser.
Is there a particular moment / story that really stands out to you from your time volunteering in this role?
There was one patient in particular who was the most friendly patient I’ve had so far. They were having a bit of difficulty with something but rather than making a big thing out of it, we had a laugh about it and I’ve remembered that ever since. When I saw them again on another shift, they remembered me and we had a conversation about some of the things we’d talked about the last time, so it was very memorable for me.
If you were stood down during the pandemic, what did you miss most about volunteering whilst you were not able to be with us?
My role was created because of the changes caused by the pandemic so I joined during the pandemic and have been volunteering here since.
If a friend / family member was interested in volunteering with NBT, what advice and encouragement would you give them?
I would say do it! I’ve actually talked to my Mum about it; she doesn’t have time at the moment but she’s thinking of doing it one day.
Glen Springer- Antenatal Clinic Meet & Greet, Befriender
What is your volunteer role/roles within NBT?
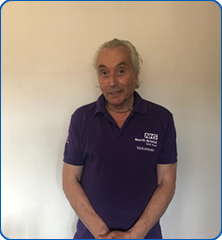
I started as a Patient Befriender on Ward 7a (Stroke and Neuro), but since July 2020 have also been doing the Antenatal Meet & Greet role.
How long have you volunteered in this role?
Befriender since October 2018; Antenatal Meet & Greet since July 2020.
Why did you decide to start volunteering here?
Following me being an inpatient after a stroke, I wanted to give something back and help empathise and give stroke patients hope for the future.
What would you say is the most rewarding part of this role?
Giving patients hope that they too will make a good recovery.
And what would you say is challenging?
It can be hard when I’m talking to patients who are feeling as though their life is over because of the stroke.
Is there a particular moment / story that really stands out to you from your time volunteering in this role?
I was talking to a patient who was suspected of having stroke and over the course of our chat, we discovered that we were neighbours, so after they were discharged, we have gone on to build up a friendship over the years.
If you were stood down during the pandemic, what did you miss most about volunteering whilst you were not able to be with us?
When Patient Befrienders were stood down, I missed interacting with the patients and possibly helping them, but fortunately, I was able to come back as an Antenatal Meet & Greeter in July 2020.
If a friend / family member was interested in volunteering with NBT, what advice and encouragement would you give them?
I would tell them to always listen to patients and not to be judgemental , and that it is a very rewarding role.
Anything else you’d like to say?
I’ve really missed coming to the hospital as a Befriender and now that I’ve had both my vaccinations, I hope it won’t be too long before I can return.
Jane Carter- Meet & Greet
What is your volunteer role/roles within NBT?
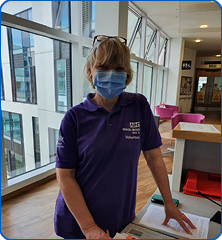
Currently I’m doing Meet & Greet on the boomerang desk outside ward 27B, but also have done antenatal Meet & Greet, and I did that even in February when it was freezing cold! During Lockdown 1, I was on the TTA team.
How long have you volunteered in this role?
Since Lockdown 1.
Why did you decide to start volunteering here?
Because of wanting to help during the pandemic and wanting to help fill the gap where older volunteers were having to be stood down from their roles.
What would you say is the most rewarding part of this role?
I really enjoy meeting people. Even though in this role people are often feeling a bit stressed and challenged, I hope I can lighten their day a bit by smiling – albeit behind my mask –and helping them. When I was doing antenatal Meet & Greet, even though people were stressed, it was a happier sort of stress and people were happy to chat. This was particularly the case with brand new, first-time dads, who were always very chatty and keen to talk, offload and share their worries and concerns; they made me feel like a wise old woman!
And what would you say is challenging?
Seeing distressed relatives can be quite hard. One time there was a family who had been called in because their relative was dying, but then when they arrived, they were too late. I really wanted to help.
Is there a particular moment / story that really stands out to you from your time volunteering in this role?
When I was meeting and greeting on Antenatal, I would sometimes speak to parents who had lost babies and were part of the Rainbow group, who come regularly for check ups. Sometimes, whilst they were waiting, they were would share their stories with me and speak openly and honestly about what they had been through. It made me feel very privileged. Even though it is upsetting hearing about how a family has lost someone, and I knew I wasn’t really making a difference to their losses, it just made me feel like I was part of something really big and sharing a part of someone’s very momentous moment in their life.
If you were stood down during the pandemic, what did you miss most about volunteering whilst you were not able to be with us?
Actually, it was my choice to stand down, towards the end of Lockdown 1. The reason I had started volunteering was to help during Covid, so when that felt like it was all going to be fine again and everything was going back to normal, then I stopped my volunteering. But by the third lockdown in January, I felt that I should see if there was anything else I could do, so that’s why I came back.
If a friend / family member was interested in volunteering with NBT, what advice and encouragement would you give them?
There are so many different roles and I think one of the things that happens here well is matching you to a role that you’re suitable for, so I can imagine if I was recommending it to family and friends, I’d tell them to have a good think about what they would like to do and what they’re good at. They could be confident that the team here are really good at then matching you to something that suits both what you want to do but also matches your skills and your approach to things.
Anything else you’d like to say?
I think there is something really special about the team who support us here. It makes a big difference and makes you feel part of something bigger and also makes you feel really valued and have that feeling of belonging.
James Pirrie- Response Team
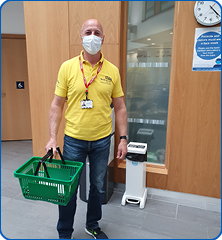
What is your volunteer role/roles within NBT?
I’m on the Response Team.
How long have you volunteered in this role?
Since December 2020.
Why did you decide to start volunteering here?
I’m retired and do a bit of other volunteering. A friend who volunteers with the Move Makers told me about the Response Team role and thought it would suit me.
What would you say is the most rewarding part of this role?
During Covid at its height, you could really see and feel just how busy they were in the wards and just knowing that you were doing your bit to help take a bit of that pressure off with whatever little thing it is you can do is really good.
And what would you say is challenging?
Nothing really. I turn up, get on with it, and it’s absolutely fine.
If you were stood down during the pandemic, what did you miss most about volunteering whilst you were not able to be with us?
I have continued volunteering right the way through the pandemic.
If a friend / family member was interested in volunteering with NBT, what advice and encouragement would you give them?
I’d say totally! Just go and do it! For me, during lockdown it’s been a bit of a godsend to get out and do something, which is probably as much of a help for me as it is for you. Going out to do something positive is quite nice instead of sitting around.
Anything else you’d like to say?
I have to say you definitely look after your volunteers here at NBT – certainly better than a lot of other organisations do, which is nice. Both my Covid vaccinations were given to me before most of my friends and family had even had their first one! I’m very well looked after here.
Jane Hicks- Response Team
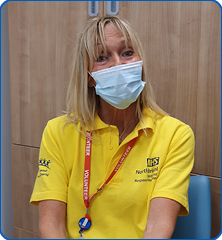
What is your volunteer role/roles within NBT?
I’m part of the Response Team.
How long have you volunteered in this role?
Over a year.
Why did you decide to start volunteering here?
I have two sisters who were both nurses here and one of my sisters had a meningioma, so she had an 18-hour operation here. Also, I noticed I was flicking through Instagram a lot and it comes up with the time and shows you how long you’ve spent on there, so I thought to myself: Right, I’ve wasted 3 hours, I’m going to delete Instagram and put my time to good use instead!
What would you say is the most rewarding part of this role?
Just knowing that you are helping other members of staff, who are so, so busy; I think that’s it for me. If you can help and take that little bit of pressure off, even if it’s just by collecting some drugs and bits like that, that’s what is rewarding for me.
If you were stood down during the pandemic, what did you miss most about volunteering whilst you were not able to be with us?
I volunteered right through the pandemic, alongside running my cleaning business.
If a friend / family member was interested in volunteering with NBT, what advice and encouragement would you give them?
I’d say it was really rewarding. A lot of family and friends ask about it and say they’re interested in it but I think a lot of them are waiting until the pandemic is over. A few of them have tried to get into volunteering but there weren’t as many roles around because of Covid but I’d tell them it is a really nice thing to do.
Anything else you’d like to say?
I’m very happy here!
Martin Bowditch- Response Team and Mobile Shop Volunteer
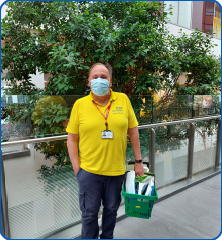
What is your volunteer role/roles within NBT?
I’m on the Response Team and prior to Covid, I did the Mobile Shop, pushing the newspapers around on the trolley.
How long have you volunteered in this role?
About 2 and a half years.
Why did you decide to start volunteering here?
I’m a retired Mental Health Nurse and had always done volunteering, even when I was still working. I just find it quite interesting, the whole volunteering experience. I quite like being a people person and being involved.
What would you say is the most rewarding part of this role?
I enjoy knowing that my role is definitely helpful - I get that feedback from Nik [Nicola Crane, Volunteer Coordinator], from the Pharmacy, and from the Wards; so it’s great knowing that I’m being useful. I also like that it’s not a ‘flaky’ role; it is a constant and it provides consistency week in and week out.
And what would you say is challenging?
Personally, the only thing I find challenging is remembering which side is A and which is B on the wards! To be honest, maybe that’s what I quite like about this – I don’t find it really challenging. It’s picking up some medicines and dropping them off. So it’s straightforward and I know I’ve been useful.
Is there a particular moment / story that really stands out to you from your time volunteering in this role?
With the Mobile Shop, I really liked being able to have a chat with the patients and often you’d get patients who were in for a few weeks at a time so you’d get to know them a bit, which was always nice. Also in the Response role, the feedback from the Pharmacy team, particularly at the height of Covid, when everyone was in their full PPE and there were so few people around, we were being told very clearly that they really valued our role. We really heard that a lot and it was great!
If you were stood down during the pandemic, what did you miss most about volunteering whilst you were not able to be with us?
My Mobile Shop role was stood down, and I do really miss that; but out of the pandemic this new Response Team role has been born and it’s been brilliant! It’s been that constant during the pandemic that just gave me a bit of structure. It was a regular thing on a Thursday and that bit of structure was a really good thing.
If a friend / family member was interested in volunteering with NBT, what advice and encouragement would you give them?
It is about being realistic and finding your own niche. I wouldn’t say the Response Team role is for everyone, but it’s about finding the role that’s right for you and I would say that once you find that, it is generally very, very healthy and positive.
Anything else you’d like to say?
The way that this Response Team role has been set up and run during the pandemic has been very smooth and I am glad that this role has still carried on beyond the height of the pandemic.
John McLellan- Response Team and Patient Partner
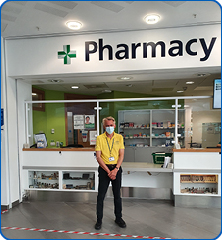
What is your volunteer role/roles within NBT?
Initially, I was involved in committee roles. I was invited to become a part of the Patient Partnership Group and as a result of that I attend various committees such as the Clinical Effectiveness and Audit Committee and the Medicine Management Group as a patient or public representative.
The other role I do is a Response Team volunteer, which is delivering medicines around the wards of the hospital.
How long have you volunteered in this role?
About 4 years in committee roles; Response Team since April 2020.
Why did you decide to start volunteering here?
I’d worked in the NHS as a Management Consultant for the 8 years previous to coming here as a volunteer, so coinciding with retiring, I really felt I wanted to stay involved in the NHS. But more deeply than that, the NHS has been a part of my life, for good and bad reasons, since I was a kid. It’s in my DNA, so I felt there’s no place I’d rather be volunteering than here.
What would you say is the most rewarding part of this role?
It’s two-fold really. Firstly there’s the sense of doing something useful; contributing to something valuable. Being part of the NHS, even in a small way is very important to me. Also, it’s the interactions with people. Over the last 15 months, I’ve gradually gotten to know people in Pharmacy and on the wards and just other people around the hospital that you see on a daily basis, and I just like the social interaction it really supported me during the pandemic”.
And what would you say is challenging?
Apart from the TLA (Three Letter Acronyms) problem? The committee work can be quite challenging as often there are a lot of senior people in these meetings and at times, as I don’t have that detailed knowledge that they do, it can be a struggle for myself to keep up. Just remembering why you’re there and trying to do something useful or purposeful when you’re in a meeting, which sometimes can just be about asking a question, really just reminding people that there is a patient representative in the room can make a difference.
The most challenging aspect of the Response Team role is a physical one. Doing a 4 hour shift is hard work, and if someone wasn’t physically fit, it wouldn’t be for them. It is 4 hours walking up and down the hard floors of the hospital and it can be really tiring sometimes – but not to the point that I’d want to stop doing it!
Is there a particular moment / story that really stands out to you from your time volunteering in this role?
When Covid numbers were quite high, there were times I’d turn up at a ward with some deliveries just as a patient was leaving the hospital after a long stay. All the staff in the ward would line up to clap them out and I’d just have to join in! Everyone would be in tears including me. It was very emotional.
Also, sometimes the hospital has been pretty empty, especially during the early days of the pandemic and sometimes I would find people just lost, both physically and mentally in the hospital. Sometimes I’ve gone up to someone looking a bit lost and just asked if there was anything I could do for them, if they’d like a glass of water or something and they’d be so grateful. It makes you realise it really doesn’t take much sometimes just to transform things for people. People coming in here are often very anxious and any little thing you can do can make a huge difference.
If you were stood down during the pandemic, what did you miss most about volunteering whilst you were not able to be with us?
With some of the committee work I was doing, a lot of the meetings were all suspended and my work was drying up so I was very grateful when the hospital got in touch and asked me if I’d be interested in doing the Response Team role.
If a friend / family member was interested in volunteering with NBT, what advice and encouragement would you give them?
With the Response Team role, people need to think about the physical demands of the role, but otherwise I would encourage people to get involved because the pay-off is great! There’s a lot of different roles volunteers can do here so if people can give a few hours, I think it’s very rewarding.
Anything else you’d like to say?
Just keep letting me do it! I love it – all of it!
Jan Bowen- Response Team and Pets as Therapy Volunteer
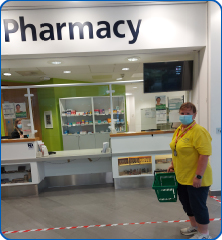
What is your volunteer role/roles within NBT?
I’m on the Response Team but am also a PAT (Pets as Therapy) Dog volunteer with my lurcher, Otis.
How long have you volunteered in this role?
Otis and I have been volunteering since late 2016 and then I started the Response role in April 2020.
Why did you decide to start volunteering here?
I gave up work and adopted Otis, and that was quite a big change in my life. I wanted to do something with him, so I registered him as a therapy dog and then Otis and I used to visit here, a school and a care home. It was something to do with him, so I could work with him rather than leave him at home. I’d read a little bit about the effect of dogs, but actually seeing it, I was really touched and shocked at how much the dog affected people in a really positive way; particularly Dementia patients.
We used to go into Elgar, which is a transition ward with quite a few Dementia patients and it was just lovely sometimes when patient’s relatives would see them chatting about the dog and say “Oh wow; that’s my Mum / that’s my Dad – I’ve not seen them like this for years!”
What would you say is the most rewarding part of this role?
With the dog, it’s seeing that reaction from people. You can’t walk up and down this place with Otis without somebody stopping you to say hello or putting a smile on someone’s face, so that is very rewarding, because you make a difference. With the Response Team role, during the first lockdown, it gave me a sense of purpose. I’m not medically trained, but I was actually getting out of the house and coming somewhere where I truly felt like I was adding value; and being part of a team is rewarding too.
And what would you say is challenging?
The physical side sometimes. It’s a lot of walking – I do up to 5 miles on a shift sometimes and it can be quite tiring, but other than that it’s not a problem; I enjoy coming in.
Is there a particular moment / story that really stands out to you from your time volunteering in this role?
I have had members of staff come up to me and Otis when they are having a difficult day and just need to clear their head. They’ll just spend some time fussing Otis and chatting to him and at the end they’ll tell me it was just what they needed and has done them the world of good.
Sometimes I’ve visited patients who have to be in hospital a while and are missing their own dog. Just sitting with Otis for 15 minutes, just fussing him, while they are really missing that dog contact – they’ve told me how much it relaxes them and helps them come to terms with long hospital stays.
There have also been some end-of-life visits, which are very moving.
If you were stood down during the pandemic, what did you miss most about volunteering whilst you were not able to be with us?
PAT dogs were stood down but then fortunately, pretty much within a week of that, I got the email asking if anyone was interested in doing the Response role, which was great as it felt like my life was empty again. So I really only had a week off and then volunteered right the way through – and that was quite eerie, because the Brunel building is a real buzz normally, with lots of people and noise around, but there were times where there would only be about 10 people, the whole length of the hospital, so that quietness was really strange – it’s nice to have the hubbub back!
If a friend / family member was interested in volunteering with NBT, what advice and encouragement would you give them?
Oh I’d definitely encourage them – in fact I’m an assessor for PAT dogs and there are a couple of people I’ve referred here and they’ve subsequently signed up as PAT dog volunteers. It also really helps that there is such a good focus on fostering a team spirit and giving us a sense of belonging. It is something that is really important and Nik [Nik Crane, Volunteer Coordinator] provides that really well.
Anything else you’d like to say?
I really enjoy it and I think that when circumstances allow it will be really lovely if the Response Team can actually meet for a coffee somewhere and put faces to names – as the team was formed during the pandemic and all work different shifts – just to engender that team environment in the way that the Move Makers have.
Eleanor Guiney- Fresh Arts Pianist
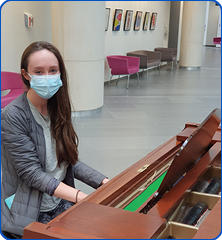
What is your volunteer role/roles within NBT?
I am one of the volunteer pianists, so I try to play the piano here (in the Brunel building atrium) once a week.
How long have you volunteered in this role?
I actually started at the beginning of the pandemic so since around March 2020.
Why did you decide to start volunteering here?
I love playing piano and I’ve always played piano throughout my life so I was always really attracted to playing the piano here. I thought it was a really good opportunity to contribute to the community here and I just like adding a touch of positivity into the atmosphere.
What would you say is the most rewarding part of this role?
I think the it’s the feedback I get from patients and staff – it’s been really positive and I do really feel like it makes a difference to people and people really enjoy the music, so that’s been really rewarding. It has also motivated me to practise the piano more, which has been good too!
And what would you say is challenging?
Just the challenges of performing I think, like trying to be confident in playing in front of people and trying not to get distracted by the people in your environment moving around – that’s probably the most challenging part.
Is there a particular moment / story that really stands out to you from your time volunteering in this role?
I’ve sometimes been approached by people after I’ve been playing asking me to play at events, so that’s always really exciting! Overall, I’ve always had good feedback and it’s been a really enjoyable experience.
If you were stood down during the pandemic, what did you miss most about volunteering whilst you were not able to be with us?
I actually started during the pandemic and it’s been a real lifeline that I’ve been able to do it. It’s been something more positive and been helpful for me to have a focus and something to put my energy into – it’s been good.
If a friend / family member was interested in volunteering with NBT, what advice and encouragement would you give them?
I would really encourage them to do it – particularly any pianists who are wondering whether they’re good enough or whether they’d be able to; I would really encourage to do it and I think it really motivates you to get practising more and you feel encouraged by the feedback from the staff and patients.
Anything else you’d like to say?
I’d just like to say thank you to the whole community because it’s been really positive and enjoyable.
Georgina Wilson- Fresh Arts Pianist
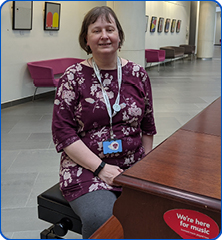
What is your volunteer role/roles within NBT?
I volunteer playing the piano in the Brunel atrium a couple of times a week.
How long have you volunteered in this role?
Over 4 years now.
Why did you decide to start volunteering here?
I used to work at the Bristol Royal Infirmary until our entire department moved from there to here and there wasn’t really an opportunity to be able to play the piano there, so when I discovered that there was a possibility to do it here, I thought “Right – let’s join in!”. I enjoy playing and hoped that other people would appreciate the music.
What would you say is the most rewarding part of this role?
There are two answers to that – one is that it certainly helps my personal wellbeing, but it is also when I know that it’s helped others. A number of times people have specifically come up and said thank you and said that it had really helped them – especially during the first lockdown when it was really tough for people and they’d come to me and say “This has made all the difference” – that’s really rewarding.
And what would you say is challenging?
I can get self conscious! So long as I think about it as being that I’m playing for myself and somebody else might just happen to hear, then I’m fine, but if I think of it as putting on a performance then I’m more likely to go wrong.
Is there a particular moment / story that really stands out to you from your time volunteering in this role?
There have been occasions when people have come up to me and said that a particular piece that I was playing had special significance to them and I’ve just happened to be playing it at a time when it was really impactful for them.
If you were stood down during the pandemic, what did you miss most about volunteering whilst you were not able to be with us?
I have continued volunteering throughout the pandemic, just as I have continued working here in the Infection Sciences Pathology Department, where my Virology colleagues have been right on the frontline with doing Covid testing and it’s been quite a challenge for the whole department to just keep things going in spite of the impact of the pandemic and with seriously reduced manpower.
If a friend / family member was interested in volunteering with NBT, what advice and encouragement would you give them?
If they were interested I’d say go for it!
Anything else you’d like to say?
Volunteering has certainly improved my piano playing! Playing on a much more regular basis has definitely made me feel more confident. I’ve played the piano for a long time – I think I started when I was about six years old – so I worked my way through the different grades when I was at school, but when I left school then it kind of went into the background, so it’s nice to be able to do something like that again and for it to be able to help others.
I also play the cello and have played the cello in the hospital sometimes too – we did a Christmas medley one Christmas and I played the cello then; but it’s a bit more difficult logistically as it’s heavy to carry and difficult to store at work – it’s nice just being able to sit just down at the piano, open it up and start to play. It’s a really nice piano to play as well; it’s got a really nice touch to the keyboard.
Scott Miner- Alcohol Team Peer Support Volunteer. PLEASE NOTE: this profile includes references to alcohol abuse.
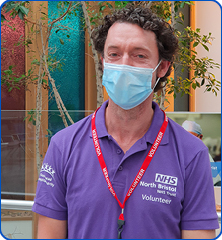
What is your volunteer role/roles within NBT?
I’m with the Alcohol Team, providing peer support for patients who’ve been admitted with problems related to alcohol misuse.
How long have you volunteered in this role?
About 2 and half years.
Why did you decide to start volunteering here?
I was a prolific relapser and had utilised the services of the hospital many times myself, so when I was asked if I would come in to volunteer by the alcohol nurses, I didn’t really hesitate as I felt that I could now give something back. Where I’d once been using and abusing the system, this was a way for me to repay. I’m with AA now and the essence of the program is to pay it forward and pass the message on, so I felt that if I was a success, I should give something back. What was given freely to me, I’m giving freely back.
What would you say is the most rewarding part of this role?
When people really listen and engage with you and you can start to see somebody getting better – I think that’s a great thing to see.
And what would you say is challenging?
Alcoholics can sometimes feel like nobody understands them; like they’re all alone in the world and they’re the only ones to have ever lived that experience, so sometimes it can be very difficult to get through to them. You can feel like you’re getting nowhere, but sometimes you can get through a tiny bit. The way I see it is that even if they do go out and drink again and they make themselves ill, at least you’ve planted a little bit of a seed so that the next time they go and do it, they can pause and think “Well actually, Scott said [this] the last time; maybe I could try [that]” so I don’t really feel like anything is wasted.
Is there a particular moment / story that really stands out to you from your time volunteering in this role?
I always remember the moment when a patient finally starts to engage with me – when they’re sitting there not wanting to engage or even look at you, and upset that they’ve got to go for this test or the other, and I say to them “You do realise that not so long ago, I was the one in that chair; I was the patient.” I can tell them “I’ve had to have that test too” or “That’s what they diagnosed me with as well, but I’ve managed to control my drinking, sort my drinking out, and now I’m doing this”. After hearing that, there is sometimes a moment where they automatically sit up, look me in the eyes and start to actually listen to what I’m saying, because they can see that I have lived experience of what they’re dealing with and now here I am on the other side. That moment when they realise that yes, there is help there; no, they’re not alone in this; yes, it is possible to come out the other side.
If you were stood down during the pandemic, what did you miss most about volunteering whilst you were not able to be with us?
A lot of what I do involves going onto the wards and speaking to the patients so I was stood down for a while we couldn’t have volunteers going onto the wards any more with all the Covid precautions. It was a bit frustrating because they are finding that especially because of the pandemic, the number of people coming in because of alcohol related issues has gone up a lot, so it was really bad timing to no longer be able to go into the wards and support them. Fortunately, they’ve now organised it so that, rather than going onto the ward, I ring people and provide peer support over the telephone.
If a friend / family member was interested in volunteering with NBT, what advice and encouragement would you give them?
As long as you’ve got something to give and you’ve got the time, then go for it! You get treated very well and it’s really rewarding.
Anything else you’d like to say?
When I was at my worst, my confidence was gone; my ability to interact with society was gone. Doing this has really built me up a lot and helped me to recognise that I am still an intelligent person and to have some self-worth again.
Adebomi Olaitan- Kidney Peer Mentor
What is your volunteer role/roles within NBT?
I am part of the Kidney Peer Mentor Group and I speak to and support people who are about to start dialysis, need to start dialysis, or are already having dialysis.
How long have you volunteered in this role?
About 2 or 3 years.
Why did you decide to start volunteering here?
I’m quite knowledgeable about renal failure because I have experienced renal failure myself. I know that getting diagnosed with renal failure can be quite daunting to a lot of people because they often don’t really understand what the kidney does – it’s only once you get renal problems you suddenly realise “Oh, the kidney does a lot, actually!”. So that’s why I wanted to help educate people , and raise awareness for people to look after their kidneys, by controlling the amount of salt in their diet or controlling their diabetes or hypertension better, as those things can lead to renal failure.
What would you say is the most rewarding part of this role?
Simply hearing people say “Thank you” and also when I speak to patients who really don’t want to do dialysis but they need it, and eventually they listen to you and they finally start dialysis. It is nice when the patients I’ve been supporting feel safe to just ring me when they’re anxious about anything and they seem really grateful – I’ve been described as “a Godsend”.
And what would you say is challenging?
Sometimes patients are really reluctant to start dialysis and it’s like no matter what you’re saying to them, it isn’t really registering. In those situations they end up learning the hard way and get a lot sicker than they would have if they had just started dialysis sooner, so that’s quite challenging. Also, sometimes the patient has done research of their own but the information that they have is not correct or from reliable sources.
If you were stood down during the pandemic, what did you miss most about volunteering whilst you were not able to be with us?
I have continued throughout – luckily, we don’t need to do any face-to-face, so I can still do it over the telephone or sometimes we can do it on Zoom.
If a friend / family member was interested in volunteering with NBT, what advice and encouragement would you give them?
I would say yes, do so; especially because here at NBT, I have felt so appreciated. You don’t do it for thank yous or gifts but the team here will take the time to say thank you, and I’ve received a lovely gift saying thank you. I have volunteered in various organisations and I know that sometimes volunteers can be taken for granted, or experience things like favouritism or feeling excluded, but there is nothing like that here at NBT. Here, you take the time and trouble to really thank your volunteers and make us feel appreciated and that made me really want to keep doing it.
Anything else you’d like to say?
Alongside my volunteering at NBT, I also set up an organisation called The Rebel With a Cause (TRWAC) CIC with a colleague. Our #UjimaKeeptheBeat campaign has been funded by the NHS Blood and Transplant’s Community Investment Scheme. It will be a series of radio shows on Ujima Radio 98fm, online workshops and community outreach to schools, colleges and universities in Bristol to raise awareness of the importance of blood, organ and bone marrow donation among BAME communities, get people signed up as donors and also encourage people to have the important conversation with their loved ones before their passing.