Introduction to this booklet
Receiving a diagnosis of cancer is different for everyone and affects each person in an individual way. However, research and patient experience indicate that it can be common for people to feel a variety of emotions that may include fear, anxiety, low mood, confusion, anger, sadness, denial, relief.
In the same way that the emotions people experience upon receiving a cancer diagnosis are unique to each individual, the ways in which people access support and the strategies they find helpful can vary too.
This leaflet brings together a variety of suggestions for helping and supporting individuals through difficult and challenging periods in their lives, as well as information on the support we offer here at North Bristol NHS Trust.
It is important to remember that professional help and support is available. Talking to your doctor or nurse to access support in your area may be the first step. Many areas also offer ‘buddy systems’ or have support groups.
Remember, if you encounter difficulties related to your cancer or treatment, even if it is some time after treatment ends, you are still able to access support.
For a list of options for support we provide at Southmead Hospital, please turn to page 11.
Physical Activity
Physical activity is any form of exercise or activity involving movement that uses your muscles. It helps to improve your physical and psychological health. Being fitter and stronger will really help you to manage your daily activities, as well as increasing the level of feel-good chemicals (endorphins) in the body. This can be a positive way of coping with the sometimes overwhelming intensity of emotions.
Physical activity is recommended by the National Cancer Institute and the British Association of Sport and Exercise Science. They advise that physical activity is safe and effective before, during and after cancer treatment.
There is research evidence that physical activity can help in the following ways:
- Reduce side effects of treatment such as fatigue
- Improve quality of life
- Reduce the risk of cancer coming back
- Help look after your heart and manage other health problems
- Reduce anxiety and depression
- Help maintain a healthy weight
- Strengthen your muscles, joints and bones
- Improve your flexibility and help keep you supple
- Increase your confidence
The Macmillan ‘Move More’ pack is an excellent resource that covers all of these points in more detail and also advises how to become more active at the different stages of cancer, how much activity is recommended and how to get started. It guides you through exercises that can be done at home and includes lots of everyday activities like walking, housework and gardening. This is available from the Macmillan Wellbeing Centre.
The Energise exercise programme is also available to introduce people to a supported environment to begin exercising. You can self-refer or you can be referred by your nurse specialist or another medical professional. Full details of Energise and other physical activity programmes near to you are available at the Macmillan Wellbeing Centre.
Diet
Eating well can sometimes prove challenging following a cancer diagnosis, due to the physical side-effects of certain cancers and their treatments. Optimising your intake to achieve the most balanced diet possible can have many positive health benefits, including improved immune system function, better energy levels and improved mood. Specialist dietary advice may be provided following a cancer diagnosis/ treatment, which should always be adhered to.
Recommendations from the World Cancer Research Fund for living well following a cancer diagnosis encourage you to:
- Consume more; fruits/vegetables/beans (aim for a minimum of 5 portions per day)
- Choose wholemeal/wholegrain cereals where possible
- Limit red meats to <500g per week
- Avoid processed meats
- Reduce salt to less than 6g/day
- Avoid/minimise alcohol
- Be a healthy weight
- Avoid nutritional supplements unless they have been recommended by your medical team, or a registered Dietician
If you would like further nutritional information, comprehensive literature can be obtained from the NGS Macmillan Wellbeing Centre.
For further support, please complete a self-referral form to see our Specialist Dietician for a 1:1 consultation. Referral forms are also available from the centre.
Sleep
It might sound obvious, but a good night’s sleep can profoundly affect how well or poorly equipped we feel to face the challenges of each new day. Getting into a healthy sleep routine can help us to feel more physically and mentally able to function on a daily basis. A healthy sleep routine might involve:
- Keeping regular hours - Going to bed and getting up at the same time each day and avoiding daytime naps will help programme your body to better sleep.
- Creating a restful sleeping environment - as quiet and dark as possible. Try and make sure your bed is comfortable, with distractions (e.g. TV) relegated to another room.
- Reducing stimulants (e.g. alcohol, caffeine, nicotine) in the evenings as they are known to disrupt sleep quality. Instead have a warm, milky drink or herbal tea.
- Exercising regularly, but not too close to bedtime
- Keeping a ‘worry pad’ - before bedtime, jot down any worries on your mind. The goal is to avoid doing these things when you’re in bed trying to sleep and spend time the next day thinking through them.
- Practising relaxation - have a warm bath, listen to quiet music or do some gentle yoga to relax mind and body.
- Don’t struggle in bed - If you can’t sleep, try not to lie there worrying about it. If after a while you realise you’re not getting to sleep, get up and do something you find relaxing until you feel sleepy again, then return to bed. This is so your mind associates your bedroom with a place for sleeping, not stress.
There is no ‘right’ way to feel
Having a positive mental attitude during and after cancer treatment can be beneficial. However, it is normal to feel a range of emotions when you are coping with treatment and recovering from it and allowing yourself to feel these without pressure to remain endlessly positive is important. Having the opportunity to talk openly and honestly about how you are feeling can be invaluable, whether this is with friends and family or through a support group or Living Well Course (see page 11).
If you feel that your mood is getting in the way of you being able to do things that matter to you (e.g. at home or work) then it is worth seeing your GP or nurse specialist to talk about options for psychological support.
Mindfulness
It’s common to find our mind worrying about the future or dwelling on the past, but this can turn up feelings of worry and low mood. Mindfulness techniques can help you to let go of the struggle with difficult thoughts and feelings and focus on the present moment. With practice, mindfulness can have a wide range of benefits including reduced depression and worry, increased sense of calm and ability to cope with physical symptoms (like pain and fatigue), as well as an enhanced wellbeing generally.
You can get information about mindfulness techniques and courses from the Macmillan Wellbeing Centre here at Southmead Hospital and Penny Brohn in Pill (www.pennybrohn.org.uk).
Body confidence
Experiencing cancer and treatment for cancer may have an impact on your appearance and the way in which you might see your body or feel about the way you look. Tips for dealing with changes in appearance include:
- Planning and practising ways to confidently answer any comments or questions.
- Taking steps to feel better about your appearance e.g. attending a Look Good Feel Better workshop (contact Macmillan Wellbeing).
- Physical activity and exercise can improve how you feel about your body whilst releasing feel-good chemicals into your system.
- Keeping a journal or express your thoughts, worries and anxieties in writing or in a creative visual way that allows you to help process difficult emotions.
- Talking to others and letting them know if you need more support.
It can feel difficult to adjust to, and talk about, changes in appearance. However, keeping your feelings to yourself can sometimes stop you doing things you enjoy or getting the right help. It can help be helpful to talk about your feelings with someone you trust and who you feel comfortable or you may find it helpful to write down your questions or concerns and share these with your health professional.
Further cancer support at Southmead Hospital
Here at Southmead, we are able to offer support at any stage of your cancer journey.
We provide access to:
- Cancer information and support clinic - information session on a range of wellbeing topics relating to living well with and beyond cancer
- Macmillan Wellbeing Centre – for information, support and a cuppa!
- Living well days - information session on a range of topics relating to moving forwards
- Living well courses – see overleaf for more information
- Exercise groups
- Dietetics advice
- Macmillan Citizen’s Advice Bureau – for financial support
- Psychological support around decision making - preparing for surgery or other treatments and support with making decisions about cancer treatments.
- 1:1 Psychology - support around coping with cancer and concerns relating to this. This could include issues like fear of recurrence, body image concerns or mood.
Please speak to your Clinical Nurse Specialist or the team in the Macmillan Wellbeing Centre if you are interested in these support options or email LivingWell@nbt.nhs.uk.
Living Well courses
These 5 week self-management courses are now offered as part of your routine follow-up care. The courses are facilitated by a health psychologist, specialist nurse and volunteer.
The courses include:
- Adjusting to the shock of a diagnosis
- Dealing with treatment and challenging side effects e.g. hair loss, disrupted sleep, managing cancer-related fatigue
- Dealing with changes in confidence and self esteem
- Managing uncertainty and worries about your future health
- Issues around recovery, such as return to work
- Difficulties in dealing with other people’s reactions e.g. family and friends distress, grief, and understanding
- Building confidence, including taking steps towards personal goals
“I came to the Living Well course in 2014/15. Depression hit me after my treatment ended and the course was a shining light in the darkness; a safe space where I could spend time with supportive women who understood what I was going through. I cannot recommend this course highly enough; I learnt so many techniques for coping with the aftermath of treatment, which I continue to use.”
Quote from Cathy, who attended a Breast Living Well course
Support networks and helplines
Having a good support network can help ease what can often be a challenging journey for people who are living with a cancer diagnosis. There are many different of forms of support that may be more helpful at different times for different people who are trying to cope with the impact of a cancer diagnosis. Support that might prove useful includes:
Family and friends
It may feel difficult talking to family and friends about your fears and anxieties, but it can often be helpful for both of you to ask for what it is you need from them in terms of support.
Hospital and medical staff
These staff (e.g. your Clinical Nurse Specialist and Doctors) are there to provide both medical care for you and to answer any questions or concerns you may have about the treatment you have received.
Helplines / websites
There are a number of both general and specialist cancer helplines and websites dedicated to supporting people with cancer. These include:
Contact us
If you have any further questions, please visit the Macmillan Wellbeing Centre at Southmead Hospital, for information, support and a cuppa! Or you can call and book an appointment with one of our support workers for a Holistic Needs assessment so that you can receive personally tailored information and support.
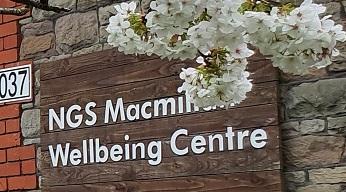
NGS Macmillan Wellbeing Centre
Beaufort House
Southmead Hospital
Westbury-on-Trym
Bristol
BS10 5NB
Email: wellbeingcentre@nbt.nhs.uk
Phone: 0117 414 7051
If you or the individual you are caring for need support reading this leaflet please ask a member of staff for advice.
© North Bristol NHS Trust. This edition published March 2020. Review due March 2022. NBT003065